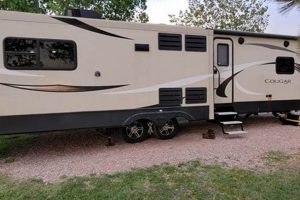
The maintenance procedure addressed here focuses on the outer layer protecting the structural integrity of a recreational vehicle. This involves addressing damage, wear, or degradation impacting the waterproof membrane affixed to the top of a towable camper. An example is patching a tear in the ethylene propylene diene monomer (EPDM) layer of a recreational vehicle caused by a tree branch.
Proper upkeep of this protective barrier is crucial for preventing water damage, which can lead to costly structural repairs and mold growth within the vehicle. Regular inspections and timely interventions extend the lifespan of the camper and maintain its resale value. Historically, various methods and materials have been employed, evolving from rudimentary patching to advanced sealant technologies, reflecting ongoing advancements in RV construction and maintenance.
The following sections will detail common types of damage, assessment techniques, necessary materials and tools, step-by-step repair procedures, preventive measures, and considerations for professional services versus do-it-yourself approaches in maintaining this critical component.
Essential Considerations for Recreational Vehicle Roof Maintenance
This section outlines crucial guidelines to ensure the longevity and effectiveness of the protective barrier on a towable camper. Adherence to these points minimizes the risk of water intrusion and associated damage.
Tip 1: Routine Inspections are Paramount. Conduct thorough visual examinations at least twice annually, and after any event likely to cause damage, such as severe weather or contact with tree branches. Identify and address minor issues promptly to prevent escalation.
Tip 2: Utilize Compatible Repair Materials. Ensure any sealants, patches, or coatings employed are specifically designed for EPDM or TPO roofing materials. Incompatible substances can degrade the membrane and compromise the integrity of the system.
Tip 3: Proper Surface Preparation is Essential. Before applying any repair material, thoroughly clean the affected area. Remove dirt, debris, and any existing loose material to promote optimal adhesion and a watertight seal. Denatured alcohol or a specialized RV roof cleaner are recommended.
Tip 4: Apply Sealants Correctly. When applying sealant, ensure complete coverage and proper bonding. Overlap seams and edges adequately. Tool the sealant to create a smooth, even surface that sheds water effectively. Self-leveling sealant is often preferable for horizontal surfaces.
Tip 5: Consider Professional Expertise. For significant damage, widespread deterioration, or if unfamiliar with roofing repairs, consult a qualified RV technician. Improper repairs can cause more harm than good and void manufacturer warranties.
Tip 6: Protect Against UV Exposure. Apply a UV-resistant coating designed for RV roofs. Prolonged exposure to sunlight can degrade the rubber membrane over time, leading to cracks and leaks. Reapply as recommended by the product manufacturer.
Tip 7: Be Mindful of Environmental Conditions. Avoid performing repairs during periods of extreme heat, cold, or rain. These conditions can affect the curing and bonding properties of repair materials, potentially compromising the seal. Adhere to the manufacturer’s recommended application temperatures.
By prioritizing preventative measures and employing appropriate repair techniques, the risk of water damage and costly structural issues can be significantly reduced. Regular attention to the camper’s roof protects the investment and ensures its long-term usability.
The subsequent section will delve into advanced repair strategies, addressing more complex scenarios and providing insights into long-term maintenance plans.
1. Inspection Frequency
Scheduled examinations of a recreational vehicles roof constitute a foundational element in preventative maintenance. The interval between inspections directly influences the efficacy of intervention strategies and the long-term condition of the roofing material. Regularity permits early detection of potential vulnerabilities, preempting escalated damage and minimizing remediation costs.
- Early Leak Detection
Increased examination frequency allows for the timely identification of minor breaches in the protective layer. Small cracks, punctures, or compromised sealant can be addressed promptly, preventing water intrusion that can cause significant structural damage, including wood rot and mold growth. Undetected leaks may expand over time, necessitating extensive and costly repairs.
- Prevention of Widespread Deterioration
Routine assessments facilitate the recognition of early signs of material degradation caused by environmental factors such as UV radiation, temperature fluctuations, and abrasion from tree limbs. Addressing these issues proactively, through the application of protective coatings or minor repairs, minimizes the overall rate of deterioration and extends the service life of the membrane.
- Warranty Compliance
Many recreational vehicle roof warranties stipulate specific inspection and maintenance schedules. Adherence to these schedules is often a condition of maintaining warranty coverage. Neglecting routine assessments may invalidate warranty claims related to roof damage, resulting in the vehicle owner bearing the full cost of necessary repairs.
- Cost Mitigation
A consistent inspection regimen reduces the likelihood of major roof failures requiring extensive repairs or complete replacement. The cumulative cost of regularly scheduled inspections and minor repairs is typically significantly lower than the expense associated with addressing advanced stages of deterioration or water damage. Prevention through frequent evaluation is economically advantageous.
The connection between inspection frequency and the longevity of a towable camper’s roof is undeniable. Integrating a proactive, regularly scheduled inspection protocol into the routine maintenance practices for such a vehicle serves to mitigate risks, reduce expenditures, and safeguard the vehicle’s structural health. Diligence in assessment contributes directly to the preservation of the asset and the safety of its occupants.
2. Material Compatibility
The selection of materials for the procedure is paramount to the durability and effectiveness of the outcome. Incompatibility between repair products and the existing roof membrane precipitates premature failure, negating the intended benefits and potentially exacerbating existing damage. For instance, the application of a non-compatible sealant on an EPDM roof can lead to the sealant’s rapid degradation, resulting in cracks and leaks. Understanding the inherent properties of the roof material, typically EPDM or TPO, and selecting repair products specifically formulated for that substrate is thus essential.
Practical implications of material selection manifest in various ways. Using a petroleum-based sealant on EPDM, for example, causes the rubber to swell and degrade, leading to structural compromise and water intrusion. Conversely, employing an acrylic-based sealant designed for TPO on an EPDM surface may result in poor adhesion and subsequent separation, rendering the seal ineffective. Choosing appropriate materials ensures a chemical bond that withstands environmental stressors, maintaining a watertight barrier. This involves verifying the chemical composition of both the existing roof membrane and the repair materials to confirm compatibility.
In summary, the adherence to material compatibility protocols is not merely a procedural step but a determinant of the long-term success of any maintenance operation. Failure to recognize and address potential incompatibilities leads to a cycle of repeated failures and increased costs. Thus, selecting appropriate, compatible products is a critical aspect of preventative maintenance, ensuring the roof’s integrity and protecting the investment in the recreational vehicle.
3. Surface Preparation
Effective execution of any repair relies heavily on meticulously readying the area intended for treatment. Within the scope of maintaining a recreational vehicle’s roof, proper preparation is not merely a preliminary step but a determinant of the repair’s longevity and effectiveness, directly impacting the roof’s ability to withstand environmental stressors and maintain its integrity.
- Removal of Debris and Contaminants
The presence of dirt, algae, loose granules, or deteriorated sealant compromises the adhesion of repair materials. These contaminants create a barrier, preventing the proper bonding of patches, sealants, or coatings to the EPDM or TPO membrane. For instance, applying sealant over a layer of accumulated grime can result in a superficial seal that fails under thermal expansion or mechanical stress. Thorough cleaning with a compatible cleaner is essential to eliminate these impediments and ensure direct contact between repair materials and the roof surface.
- Assessment and Mitigation of Existing Damage
Careful examination of the roof surface prior to the application of any treatment allows for the identification of underlying issues that may not be immediately apparent. Small cracks, punctures, or areas of delamination require specific attention and treatment before proceeding with general repairs. Failure to address these pre-existing conditions can lead to the propagation of damage and the eventual failure of the entire repair. For example, a small puncture left untreated can expand over time due to water infiltration and freeze-thaw cycles, necessitating more extensive repairs.
- Ensuring a Dry and Stable Surface
Moisture impedes the proper curing and adhesion of most repair materials. Applying sealants or coatings to a damp surface can result in poor bonding and the formation of blisters or voids, compromising the waterproof seal. Similarly, an unstable surface, such as one exhibiting excessive flexing or movement, can cause repair materials to crack or detach. Proper drying of the roof surface and reinforcement of unstable areas, if necessary, are critical for ensuring the long-term stability and effectiveness of the repair.
- Creating a Suitable Texture for Adhesion
Some repair materials require a slightly roughened surface to achieve optimal adhesion. The surface texture created through gentle abrasion enhances the mechanical bond between the membrane and the repair material. This is particularly important when applying patches or coatings to smooth EPDM or TPO surfaces. However, excessive abrasion can damage the roofing material, so a balance must be struck between creating a suitable texture and preserving the integrity of the roof membrane.
These considerations collectively underscore the critical role that readiness plays in the overall success. Neglecting these facets diminishes the likelihood of achieving a durable and reliable solution, increasing the risk of recurrent issues and potentially leading to more costly repairs in the future. Diligent execution of these steps is a prerequisite for protecting the recreational vehicle from water damage and ensuring the longevity of its roofing system.
4. Sealing Techniques
The methods employed to create watertight barriers are critically important in “travel trailer rubber roof repair”. These techniques dictate the efficacy and longevity of any remedial action taken to protect the vehicle from water intrusion, a primary cause of structural damage. Proper sealing ensures that repairs withstand environmental stressors and maintain a protective layer.
- Lap Seam Sealing
This method addresses junctions where two pieces of roofing material overlap. Improperly sealed lap seams are prime locations for water penetration. Application of self-leveling sealant, followed by tooling to ensure complete coverage and adhesion, is crucial. An example includes sealing a newly installed EPDM patch over an existing roof membrane, where inadequate sealant application leads to water wicking between the layers.
- Perimeter Sealing
This technique focuses on the edges of the roof, where it meets sidewalls or other structures. It prevents water from entering at these vulnerable points. A common scenario is sealing around roof-mounted accessories like vents or air conditioners, where gaps can form due to thermal expansion and contraction. Neglecting perimeter sealing results in leaks that can damage interior components.
- Crack and Puncture Sealing
This method involves directly addressing breaches in the roof membrane. It requires thorough cleaning of the damaged area, followed by the application of a compatible sealant or patching material. A real-world example is repairing a puncture caused by a tree branch, where a flexible sealant is used to fill the void and create a watertight seal. Failure to properly seal punctures can lead to significant water damage over time.
- Self-Leveling Sealant Application
This specialized technique uses sealants designed to flow and create a smooth, even surface. It is particularly useful on horizontal surfaces, where it fills in irregularities and ensures complete coverage. An instance of this is applying sealant around a skylight, where the self-leveling property allows the sealant to conform to the contours of the frame, preventing water from pooling and penetrating. Inadequate self-leveling sealant application results in uneven coverage and potential leak points.
Effective sealing, achieved through meticulous application of appropriate techniques, is a cornerstone of successful roof restoration on towable campers. The proper execution of these methods guarantees long-term protection against water damage and preserves the vehicle’s structural integrity.
5. Professional Assessment
Engaging a qualified professional to evaluate the condition of a towable camper’s roof is a critical step in ensuring both the safety and longevity of the vehicle. Professional evaluation offers expertise and specialized knowledge, accurately identifying issues that might be overlooked by a non-expert, thus informing the most effective course of action for roof maintenance or restoration.
- Comprehensive Damage Identification
Professionals possess the training to detect subtle signs of roof damage, such as pinhole leaks, hidden water damage beneath the membrane, or compromised structural integrity. For example, an experienced RV technician can identify areas of delamination that are not immediately visible, using specialized tools to assess moisture levels and structural soundness. Early identification of these issues prevents escalation into more significant and costly problems.
- Material Compatibility Expertise
Qualified technicians possess in-depth knowledge of roofing materials, including EPDM and TPO, and understand the compatibility requirements for repair products. They can accurately determine the type of membrane installed on the recreational vehicle and select appropriate sealants, patches, or coatings that will ensure a durable and long-lasting repair. This expertise prevents the use of incompatible materials that could degrade the roof membrane and compromise its integrity.
- Accurate Cost Estimation
Professional assessors can provide a detailed and accurate estimate of the costs associated with roof repair or replacement, taking into account the extent of the damage, the type of materials required, and the labor involved. This detailed estimate enables vehicle owners to make informed decisions about their maintenance budget and avoid unexpected expenses. For instance, a professional assessment can determine whether a full roof replacement is necessary, providing a clear understanding of the investment required.
- Warranty Compliance and Legal Considerations
Engaging a certified professional ensures that all repairs are performed in compliance with manufacturer warranties and relevant building codes. Improper repairs can void warranties and may not meet safety standards. Professionals understand these legal and compliance requirements, ensuring that all work is performed to the highest standards, protecting the vehicle owner from potential liability.
The decision to seek a professional assessment significantly influences the outcome of maintenance efforts. By leveraging specialized knowledge and experience, these assessments provide a thorough understanding of the roof’s condition, enabling vehicle owners to make informed choices that safeguard their investment and ensure the structural integrity of their towable camper.
6. UV Protection
The implementation of measures designed to mitigate the adverse effects of ultraviolet radiation is a critical aspect of maintaining the integrity of a recreational vehicle’s roof. Prolonged exposure to sunlight degrades roofing materials, necessitating repairs and reducing the lifespan of the structure’s protective layer. Effective mitigation strategies are, therefore, integral to proactive care.
- Material Degradation Prevention
Prolonged exposure to UV radiation causes the breakdown of polymers in EPDM and TPO roofing membranes, leading to cracking, chalking, and a reduction in elasticity. This degradation increases the susceptibility to leaks and necessitates premature repairs. For example, an unprotected EPDM roof exposed to intense sunlight in desert climates can exhibit significant deterioration within a few years, whereas a UV-protected roof may last significantly longer. Applying UV-resistant coatings or protective treatments can substantially reduce this degradation process.
- Protective Coating Application
The application of specialized coatings formulated to reflect or absorb UV radiation provides a barrier between the sun’s rays and the roofing membrane. These coatings typically contain UV inhibitors and stabilizers that help to prevent polymer breakdown. Regular application of these coatings, as recommended by the manufacturer, extends the service life of the roof and reduces the frequency of necessary repairs. For instance, acrylic polymer coatings, when properly applied, offer a sacrificial layer that absorbs UV radiation, protecting the underlying rubber membrane.
- Regular Inspection for UV Damage
Periodic visual examinations of the roof surface facilitate early detection of UV-induced damage. Signs of degradation, such as discoloration, chalking, or surface cracking, indicate that the UV protection is compromised and that remedial action is required. For instance, observing a powdery residue on the roof surface after wiping it down suggests that the protective coating has deteriorated and needs to be reapplied. Early detection allows for timely intervention, preventing more extensive and costly repairs.
- Impact on Sealing Compounds
UV radiation also affects the integrity of sealing compounds used around roof-mounted accessories and seams. Exposure to sunlight causes sealants to harden, crack, and lose their elasticity, creating pathways for water intrusion. The use of UV-resistant sealants and regular inspection of these areas are essential for maintaining a watertight seal. For example, replacing a cracked sealant around a roof vent with a UV-resistant product prevents leaks and protects the underlying structure from water damage.
These preventative measures are critical to effective roof management. Proper understanding of the effects of ultraviolet light enables vehicle owners to take informed action, mitigating risks and extending the lifespan of their recreational vehicle’s roof. Prioritizing UV protection helps minimize the need for extensive interventions, preserving the structural soundness and value of the vehicle.
Frequently Asked Questions
The following section addresses common inquiries regarding the maintenance and remediation of recreational vehicle rubber roofing. These questions are answered with the aim of providing clear, factual information to assist in informed decision-making.
Question 1: How frequently should a recreational vehicle roof be inspected for potential issues?
A thorough inspection should be conducted at least twice annually once in the spring and again in the fall. Additional inspections are warranted following severe weather events, such as hailstorms or heavy winds, and after any contact with tree branches or other potential sources of damage. Regularity in these inspections is key to early detection of vulnerabilities.
Question 2: What constitutes evidence of a compromised roof requiring attention?
Evidence includes visible cracks, punctures, blistering, or areas of delamination. Discoloration, chalking, and the presence of water stains inside the vehicle are also indicators. Any signs of compromised sealant around roof-mounted accessories or along seams should be addressed promptly.
Question 3: What types of sealant are compatible with EPDM rubber roofing membranes?
Acceptable sealant types include self-leveling sealants specifically formulated for EPDM rubber, such as those based on acrylic or polyurethane. Petroleum-based sealants should be avoided, as they can degrade the rubber membrane. Always verify compatibility with the manufacturer’s specifications.
Question 4: Is it necessary to clean the recreational vehicle roof before applying repair materials?
Thorough cleaning is imperative. The roof surface must be free of dirt, debris, algae, and any loose or deteriorated sealant. Use a non-abrasive cleaner specifically designed for recreational vehicle roofs to avoid damaging the membrane. Rinse thoroughly and allow the surface to dry completely before proceeding with any repairs.
Question 5: When is it advisable to seek professional assistance for a recreational vehicle roof issue?
Professional assistance is recommended for extensive damage, widespread deterioration, or any situation where the owner lacks the experience, tools, or confidence to perform the repairs correctly. Improper repairs can exacerbate existing damage and potentially void manufacturer warranties.
Question 6: How can ultraviolet (UV) radiation damage the roof, and what preventative measures can be taken?
UV radiation causes the breakdown of polymers in the roofing membrane, leading to cracking and reduced elasticity. The application of UV-resistant coatings, designed specifically for rubber roofs, provides a protective barrier. These coatings should be reapplied periodically, following the manufacturer’s recommendations, to maintain optimal protection.
The provided information serves as a general guide and does not constitute professional advice. Consult with qualified technicians for specific concerns or complex repairs.
The following section will present a step-by-step guide to performing a basic patch on a rubber roof.
Travel Trailer Rubber Roof Repair
The preceding exploration has illuminated the vital aspects of “travel trailer rubber roof repair,” emphasizing the importance of regular inspection, compatible material selection, and proper application techniques. Prevention, through UV protection and prompt attention to minor damage, remains the most cost-effective strategy. Professional assessment is often advisable, ensuring accurate diagnosis and adherence to safety standards.
Effective management of a recreational vehicle’s roof directly correlates with its overall lifespan and usability. Prioritizing consistent maintenance mitigates the risk of water damage and structural compromise, thereby preserving the investment and ensuring safe travels for years to come. Neglecting this critical area carries significant financial and safety implications, underscoring the necessity for proactive and informed roof care practices.


